| Applies to X9Vision? | Applies to X9Validator? | Applies to X9Assist? | | | | Applies to X937? | Applies to ACH? | Applies to CPA005? |
| No | Yes | Yes | | | | Yes | No | No |

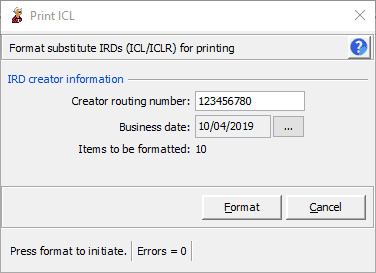
X9 IRD Print ICL/ICLR is a high level tool that allows all items within an ICL or ICLR to be printed. This function is available from the toolbar and is especially helpful when printing an entire ICLR as substitute IRDs. For example, Print ICL/ICLR can be used to print all items within an ICLR file as substitute IRDs. This print function will display a panel which allows the creator routing number and the business date to be entered, which are needed to format and print the IRDs. The creator routing number will be saved in a preferences file so it only needs to be key once, and will then be repopulated in future sessions.

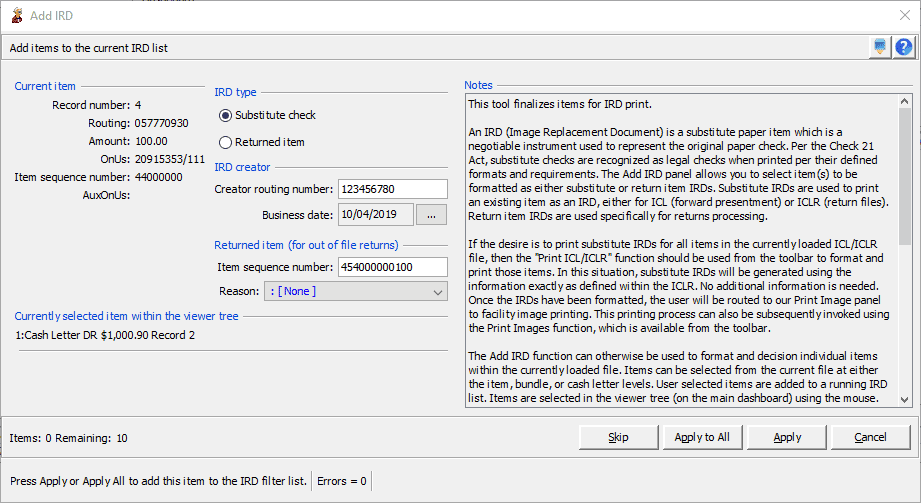
Add IRD is a more detailed function that allows individual IRDs to be decisioned with a user supplied return reason. Add IRD allows items (either individually or in bulk) to be added to a user constructed pick list which can then be subsequently reviewed and printed. The Add IRD function is more complex, because it is typically used as a mechanism to print a selected number of items from an ICL. These printed IRDs can represent forward presentment or returned items. For returns, the dialog allows separate return reasons to be specified on an item by item basis. User selected items are added to a filter list which is our general purpose facility which describe a subset of items within the current x9 file.

Our implementation leverages our filtering capabilities, which provides common facilities to review items and manipulate the resulting item list.
IRD Types
IRD items are entered as one of two types:
- An IRD Substitute is a negotiable instrument used to represent the digital reproduction of an original paper check. Substitute checks are recognized as legal checks as long as the instruments meet specific requirements. These requirements include the faithful reproduction of the paper check and warranty of the instrument by the “reconverting bank”—the financial institution that created the substitute check or the first financial institution that transferred or presented it during the check clearing process. Substitute checks are also subject to the UCC, existing federal and state check laws, and regulations specific to consumer rights that affect the acceptance of these instruments. Although a substitute check is subject to the UCC and existing state and federal check laws, the Check 21 Act takes precedence over these other laws and regulations for this instrument.
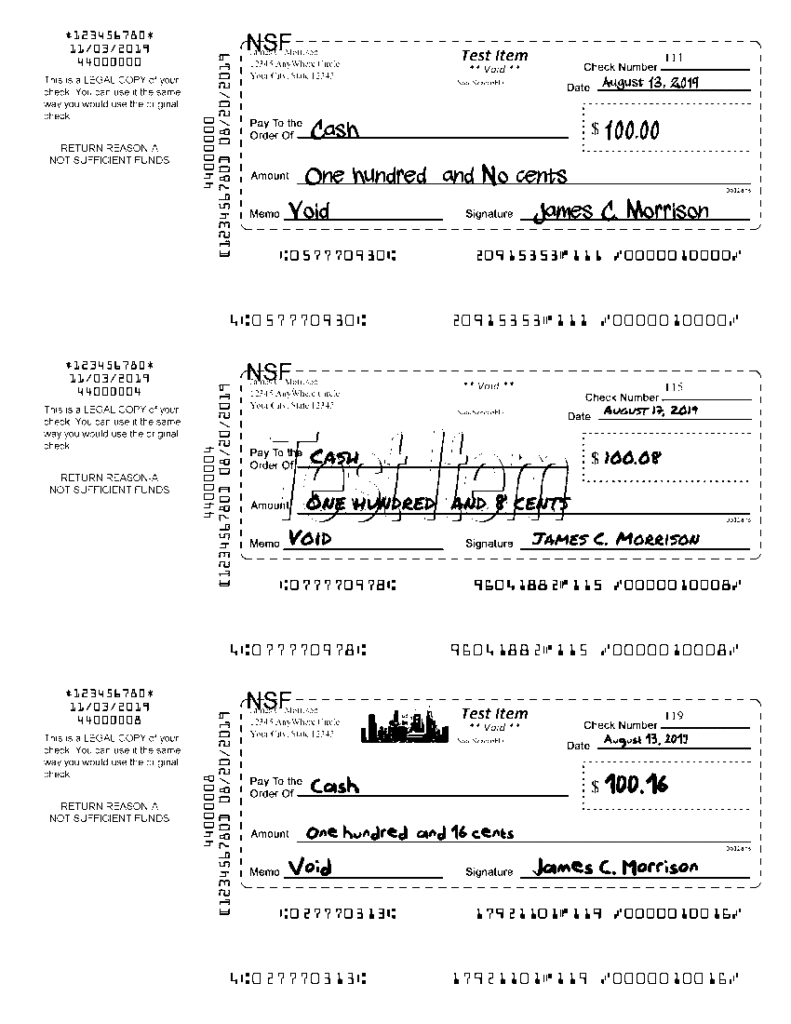
- An IRD Return represents an item that was not paid by the issuing bank for some defined return reason (eg, insufficient funds). In this situation, the paying bank stamps the item as NSF (non-sufficient funds) which identifies the reason for the return. When an item is being returned, a “5″ will be placed in the MICR line EPC field to identify the substitute check according to ANS X9.90, along with the routing number of the depository financial institution and the dollar amount of the substitute check. The paying bank returns the unpaid returned item through the routing process to the BOFD for exception handling, which would typically include debiting the customer for the returned item, sending a charge back notice to its customer (either electronically or through the mail), and most probably assessing a fee which is associated with the returned item process.
Adding Items to the IRD List
Items within the IRD List filter are constructed using a series of interactions. The ICL viewer tree (on the left) is used to identify the items to be added to the list. This can be done in multiple ways:
- Items can be added one at a time. This is done by selecting the item in the viewer tree and then invoking Add IRD from the tool bar.
- Multiple items can be added in a single interaction. This is done by holding done the CTRL key, selecting the items to be added using the mouse, and then invoking Add IRD from the tool bar.
- A block of items can be added in a single interaction. This is done by selecting the first item within the block, holding done the CTRL/SHIFT keys and selecting the last item within the block, and then invoking Add IRD from the tool bar.
- An entire bundle of items can be selected in a single interaction. This is done by selecting the bundle and then invoking Add IRD from the tool bar. An entire cash letter of items can be selected in a single interaction. This is done by selecting the bundle and then invoking Add IRD from the tool bar.
- An entire file of items can be selected in a single interaction. This is done by selecting the bundle and then invoking Add IRD from the tool bar.
The selection process can be used repeatedly to build the IRD List with the desired items, which will be displayed in a system filter. Items can continue to be both added or removed from the list as necessary. Items can also be reviewed and launched using the filter list. Once the content of an IRD List has been confirmed, the list can then be used as input to Print Image.
Entering IRD Information
The Add IRD panel allows you to enter information that is associated with each IRD within the overall list. The IRD creator and return reason must be provided for each item, both of which are needed for document formatting. This entry process can be used in multiple ways:
- Creator information is most typically assigned from the last addendum in the endorsement chain, but can also be explicitly entered.
- Items can be processed one at a time, which allows the appropriate return reason to be assigned to each item.
- Items can be processed in a grouped (repetitive) manner, which is appropriate when the return reason is either being assigned from the last addendum in the endorsement chain, or the same return reason is being assigned to all items.
The number of remaining items to be decisioned will always displayed on the action line in the lower left corner. Buttons on the action panel are used to either apply (add) or apply all items to the accumulated IRD print list. The process continues for all remaining items within the list.
Once all selected items have been decision, the entry process will be terminated and the resulting IRD List will be displayed. You can use the filter tab to launch to any given item or alternatively remove items that were added in error. Also note that the return reason is displayed for each item within the filter list, which allow you to review the assigned returned reasons for all items.
Using the IRD List to Print Item Images
Once the IRD List has been finalized and confirmed, it is then used as a filter for other functions including Print Images, which includes facilities to print check images in various page layouts (either system or user defined). Images are commonly formatted and routed to a MICR printer.
Print includes “Letter 3 x 1 IRD Print” which is a system defined print format for IRDs and should be applicable to most user environments. It is important to note that this print format can be adjusted based on your check template and specific printer environment. The important attributes of this image print format are: Letter; 3×1 formatted; front and back images; two sided printing (front images on even pages and back images on odd pages); and collated which retains the item order after printing and bursting.